Our office bathroom has been the same since we moved in 7+ years ago! The same old dingy, yellowish walls left behind by whatever officed here prior to us! And no matter how clean it actually was, it always still felt dirty. So my boss gave me a $100 allowance to work my magic! I thought there is no way I can transform this grody space into something clean and classy! But I surprised myself! I really enjoyed the challenge! I had to get pretty creative and really decide where the most bang for the buck would be! It kind of took me back to my roots of making something out of nothing, that trash-to-treasure or Trading Spaces mentality that I first fell in love with!
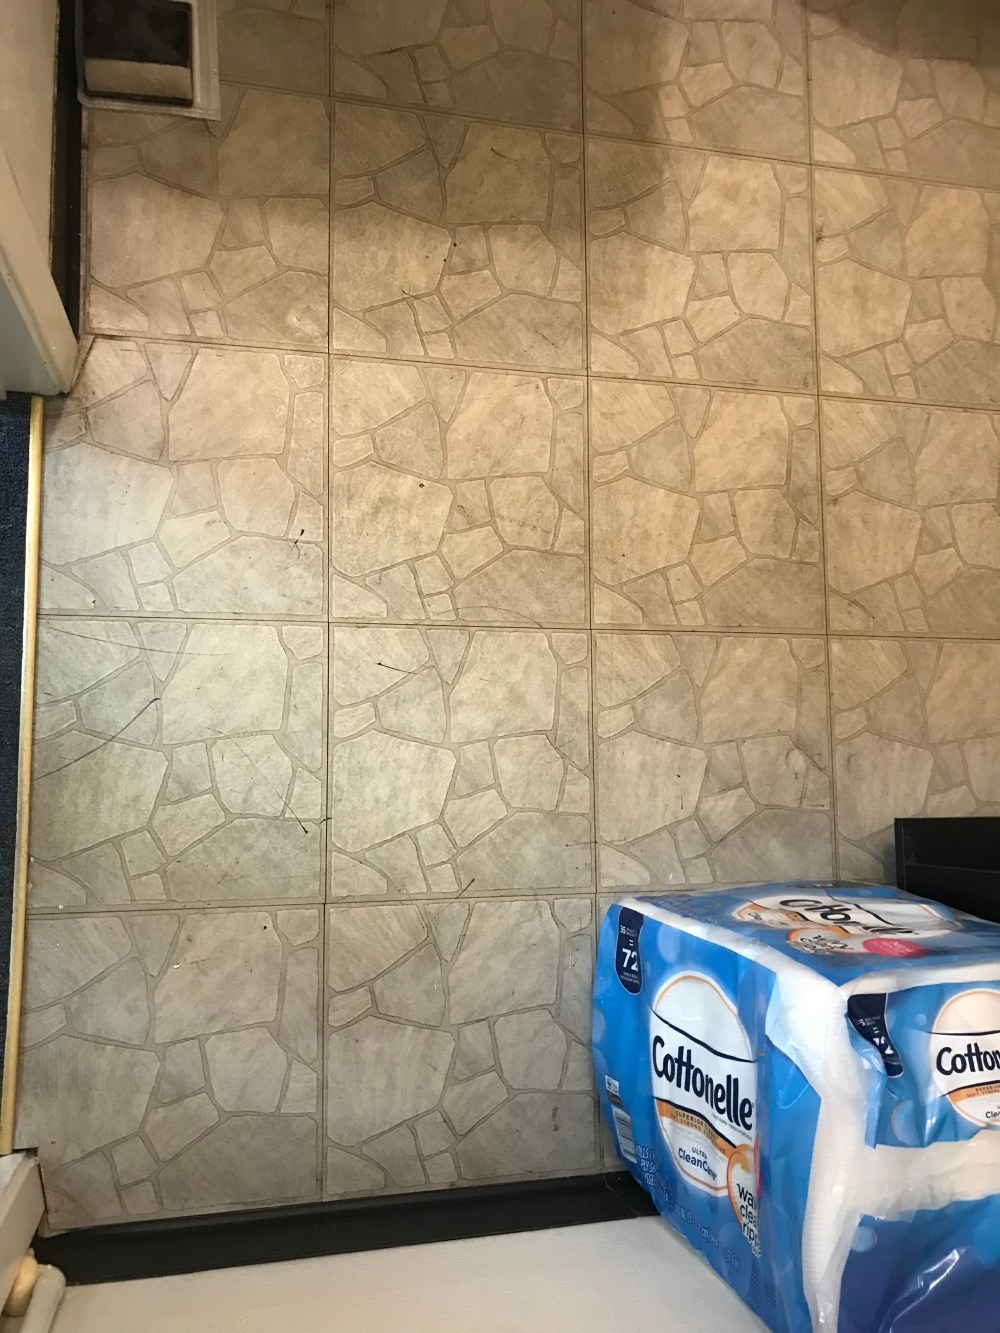
Here are the befores: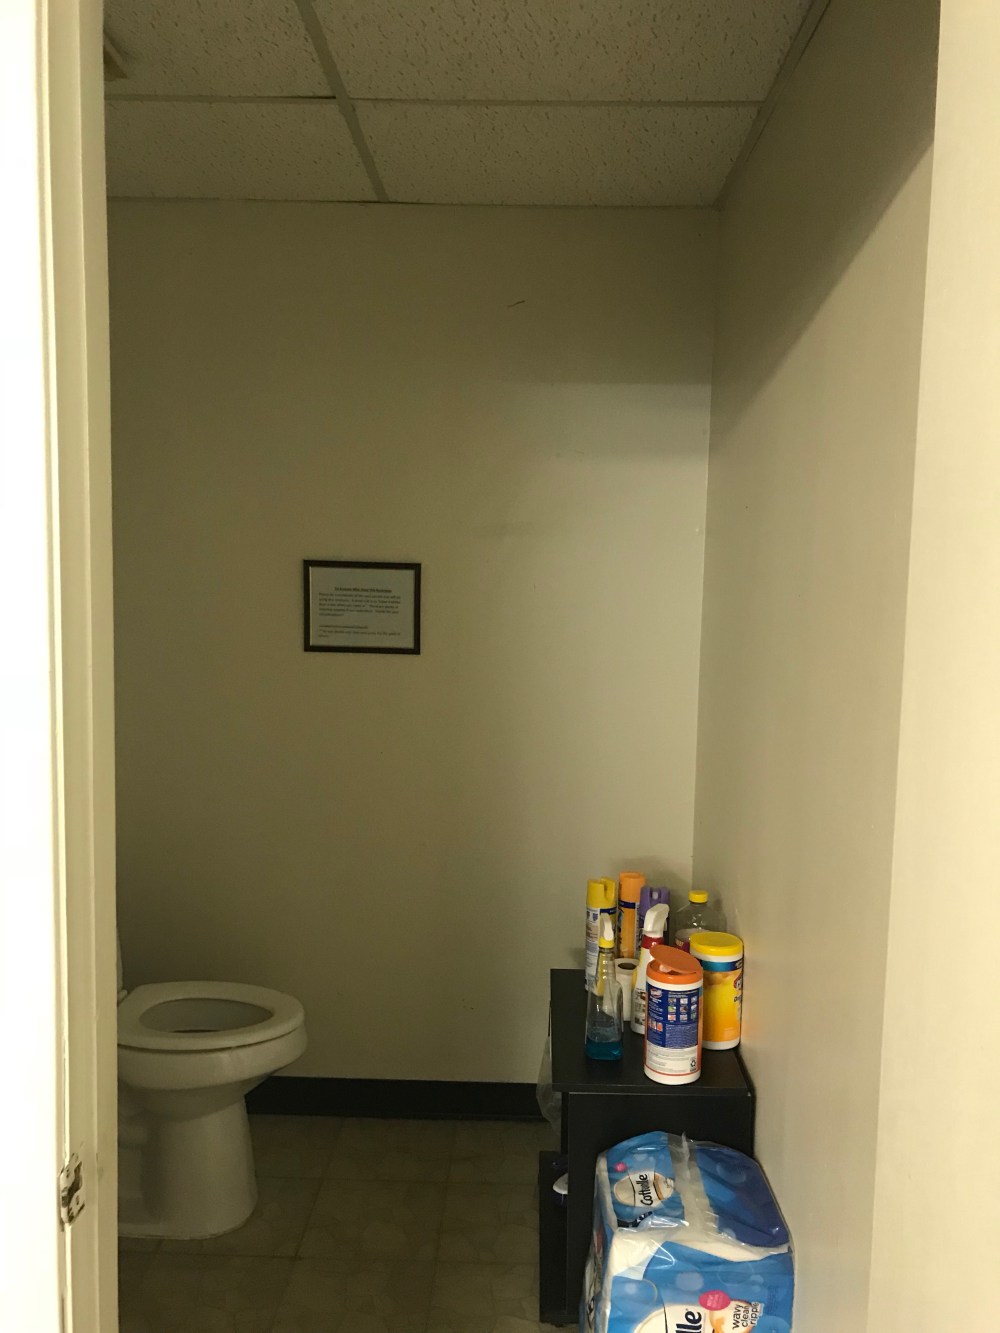


Step 1. Paint! Paint is the easiest, fastest way to instantly transform any space. But let me backup a second here, because a fresh new paint color first needs a clean and fresh pallet. That meant puttying lots of holes, and re-texturing a few areas, as well as a good thorough mopping of the walls!!! And then I was off to purchase paint! I lucked out and was able to find a nice medium grey paint in the clearance section of Home Depot for just $10! I also picked up a quart of a crisp white color for the door and trim for just $2! I had all the paint supplies on hand needed for this project, so $0 cost there!
Tip: Don’t be afraid to go with a darker paint choice in a small space. You can always use lighter flooring, ceiling, and accessories to brighten it up. The light fixture you choose also plays a big role here. When you don’t have natural light, use good bulbs and mirrors to make it appear brighter.
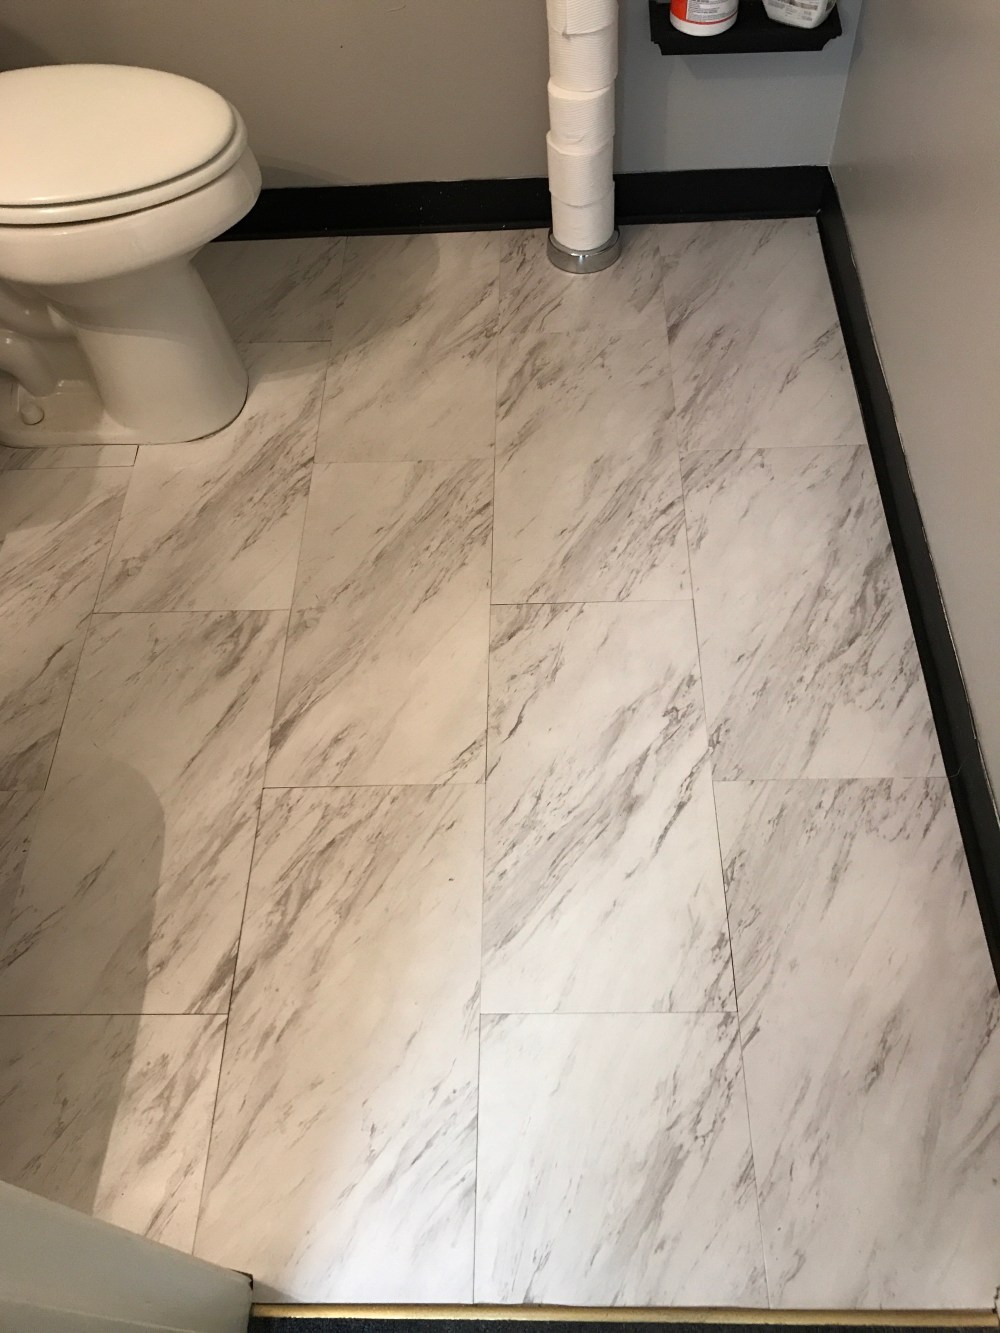
Step 2. Flooring. I chose to go right over the top of the current disgusting laminate with a peel & stick white carrerra marble-looking tile. I chose this to brighten up the space and because the grey grain matched the paint very well. And I picked 2′ by 1′ tiles to make the space feel even larger. Then I set out to cutting and laying them! Let me tell you, I learned A LOT in this process! I made a few mistakes but had over-bought for exactly that reason! But it’s such a quick and easy process and made a huge impact! I will likely use this product again!
Step 3. Decorate. I chose to keep the black floor border, paper towel holder, white mirror, as well as the sink and faucet. I did do a little toothbrush scrubbing to get that faucet looking sparkling-new again! Of course, I also could not change out the ceiling tiles. We had some black Dollar Tree picture frames lying around that I had previously used in my office, and I simply chose a bible verse, had it handwritten on some good cardstock, framed and hung! I also purchased 3 small black shelves to serve as cleaning supply stock instead of getting a bulky cabinet to mount that would hide the supplies, or keeping them stashed on the floor in the corner. (We keep only what is necessary and backstock the rest of our office cleaning supplies.) The reason for doing this is to help keep this bathroom clean at all times as it serves as our customer bathroom as well as for the office staff. I also purchased a new switch-plate, small trash can, toilet paper holder and scrub brush holder. All in white and silver to keep that color scheme and this appearance of cleanliness flowing throughout the space. We did find a decent black light fixture, something simple with clean lines to replace the old. This is probably my least favorite item in the new bathroom, but it was only $9, and we left the glass globe off of it, revealing two bright bulbs.
The After: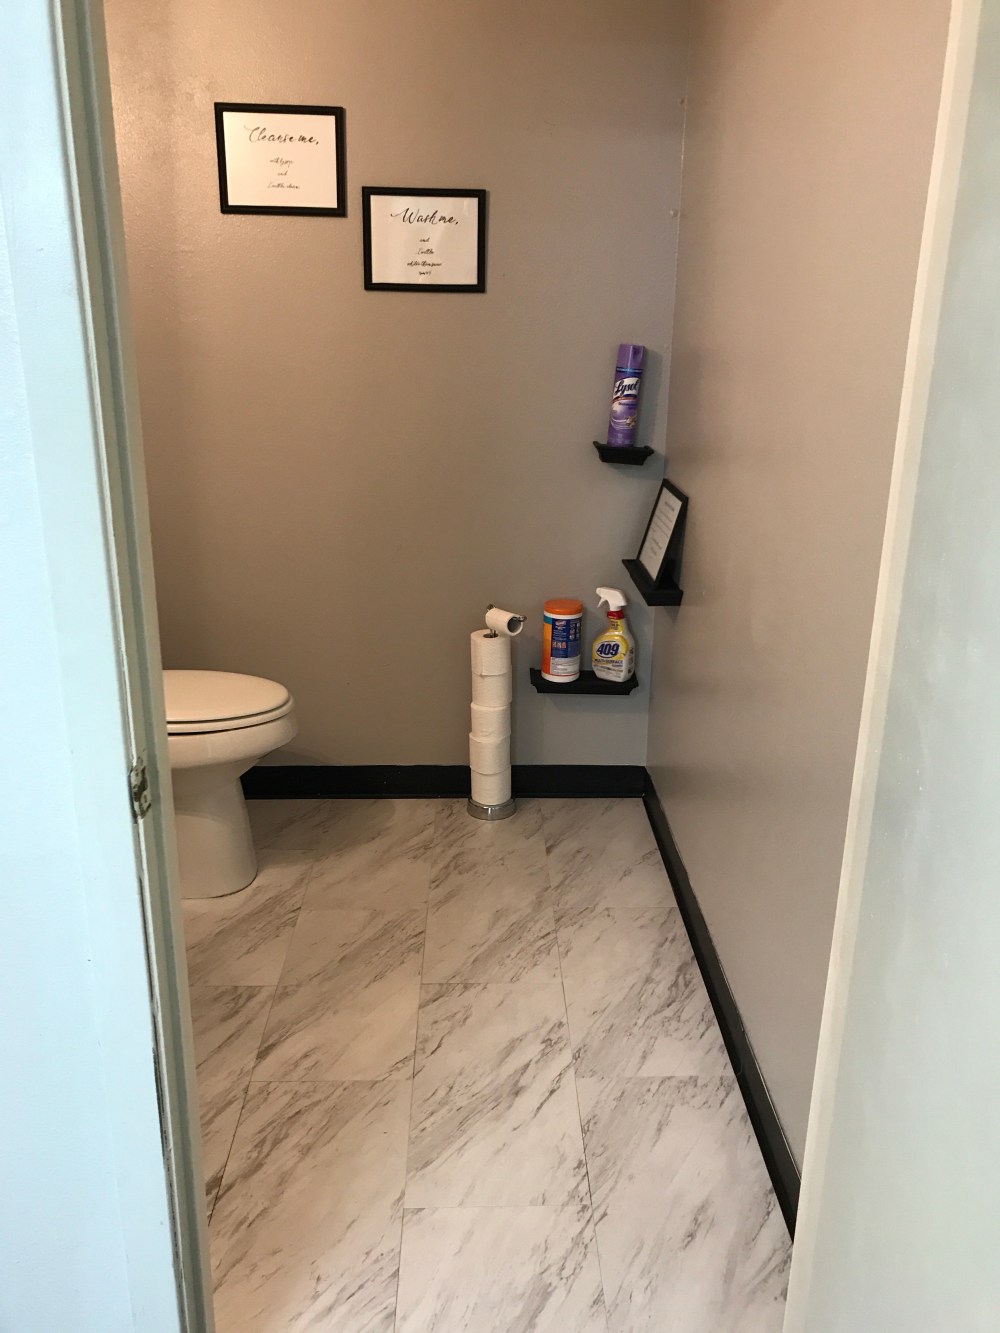


This project took about a week of time spent here or there when I had the free time during the work day! Otherwise, it would’ve only been about 2 days total with drying time. And the result is a simple, clean and classic public restroom. Everyone is happy with the restyle and seems to be doing their part to keep it that way! I spent $111 total! I think I could’ve saved more with some savvy shopping if I hadn’t been on time crunch to complete this while my boss was on vacation!
So there you go! The cheapest bathroom restyle of all time! What do y’all think? What would you have done differently? Do you have small space and budget you want to try this on? I’m in the process of building a bathroom reno idea board for home so I can showcase my creativity and thriftiness to y’all! Another challenge I can’t wait to start!
